Ever wanted to keep an eye on your home or business from anywhere?
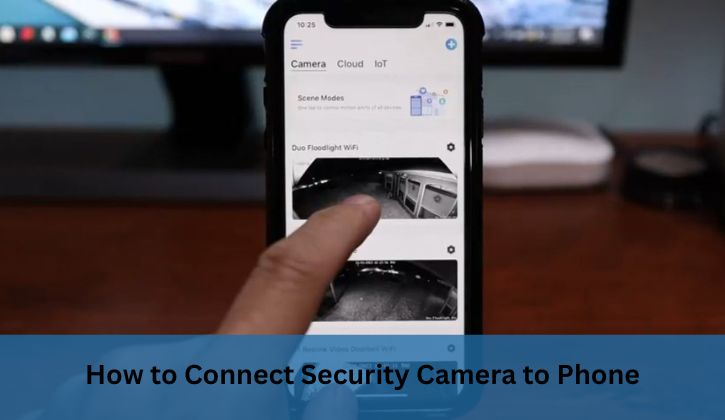
Learning how to connect security camera to phone lets you monitor live footage, receive alerts, and control settings right from your smartphone. Whether using Wi-Fi, cellular data, or a hotspot, modern security cameras make remote surveillance simple.
This guide walks you through setup steps, troubleshooting tips, and unique hacks to ensure your camera stays connected, keeping your property secure with ease.
Understanding Security Camera Connectivity
Security cameras have evolved, offering seamless smartphone integration for real-time monitoring.
Connecting your camera to your phone allows you to view live feeds, adjust settings, and receive motion alerts, making it ideal for home security, business oversight, or checking on pets.
The process involves pairing your camera with a mobile app via Wi-Fi, cellular data, or a hotspot. Each method has unique requirements, and understanding them ensures a smooth setup for reliable surveillance.
Read More: How Long Do Security Cameras Keep Footage?
Why Connect Your Camera to Your Phone?
Smartphone connectivity offers:
- Real-Time Monitoring: Watch live footage from anywhere, anytime.
- Instant Alerts: Get push notifications for motion or suspicious activity.
- Remote Control: Adjust settings, like motion sensitivity or recording schedules, on the go.
- Convenience: Access multiple cameras from one app, perfect for large properties.
Types of Connections
Security cameras connect to phones through:
- Wi-Fi: Most common, requiring a stable home network for setup and streaming.
- Cellular Data: Uses a SIM card for remote areas without Wi-Fi, ideal for outdoor cameras.
- Hotspot: Leverages your phone’s mobile data to create a network, useful in areas with unreliable Wi-Fi.
- Local Network: Connects without internet for local viewing, though limited to the router’s range.
How to Connect Security Camera to Phone?
To connect a security camera to your phone, download the camera’s app from the App Store or Google Play, create an account, and add the camera by scanning its QR code or selecting it as a Wi-Fi network. Ensure both devices are on the same Wi-Fi network, follow on-screen setup instructions, and pair the devices. For cellular models, insert a SIM card with a data plan. Test the live feed to confirm connectivity.
Step-by-Step Guide to Connecting Your Security Camera
Here’s a detailed breakdown to get your camera linked to your phone, covering various connection methods.
1. Choose the Right Camera and App
Select a camera compatible with your phone’s operating system (iOS or Android). Most brands, like Reolink, Ring, or Arlo, offer dedicated apps. Check the camera’s manual or packaging for the app name, and download it from the official App Store or Google Play to avoid security risks. For example, a user praised the Reolink app for its intuitive setup with QR code pairing.
2. Set Up the Camera
- Power On: Plug in or charge the camera, ensuring it’s in pairing mode (check for a blinking LED).
- Create an Account: Open the app and sign up, using a secure password. Some apps allow Google or Apple login for convenience.
- Add the Camera: In the app, select “Add Device” and scan the camera’s QR code (usually on the device or manual) or enter its serial number. Alternatively, select the camera from your phone’s Wi-Fi settings if prompted.
3. Connect via Wi-Fi
- Same Network: Ensure your phone and camera are on the same 2.4GHz Wi-Fi network, as most cameras don’t support 5GHz.
- Follow Instructions: The app guides you to enter your Wi-Fi password and pair the camera. Keep the phone close to the camera (within 10–15 feet) during setup.
- Test Connection: Once paired, open the app to view the live feed. Adjust settings like motion detection or resolution as needed.
4. Connect via Cellular Data
For cameras with SIM card slots (e.g., Reolink Go or Eufy 4G LTE Cam):
- Insert SIM Card: Use a SIM with an active data plan. Verify activation with the provider.
- Configure Settings: In the app, enter APN details (provided by the carrier) to enable cellular connectivity.
- Pair with Phone: Follow the app’s QR code or manual setup to link the camera. This method works without Wi-Fi, ideal for remote locations.
5. Use a Mobile Hotspot
If Wi-Fi is unavailable:
- Enable Hotspot: On your phone, activate the mobile hotspot and set a secure password.
- Connect Camera: In the camera’s settings, select your phone’s hotspot as the network.
- Pair via App: Use the app to complete pairing, ensuring the camera connects to the hotspot for data transfer. This method drains phone battery, so use sparingly.
6. Local Network Connection (No Internet)
For local viewing:
- Connect to Router: Link the camera to your router via Ethernet or Wi-Fi, even without an active internet connection.
- Access via App: Use the app to view footage when your phone is on the same local network. This limits remote access but works for home setups.
Read More: How Long Do Security Cameras Keep Footage in Schools?
Troubleshooting Common Connection Issues
Connection hiccups are common but fixable. Here’s how to tackle them:
- Weak Wi-Fi Signal: Move the camera closer to the router or use a Wi-Fi extender. A user resolved lag by placing their camera within 20 feet of the router.
- QR Code Issues: Adjust phone brightness or lighting to scan successfully. Avoid direct sunlight.
- Network Mismatch: Ensure both devices are on the same Wi-Fi network, not mobile data.
- App Permissions: Grant the app access to Wi-Fi, location, and camera settings.
- Firmware Updates: Update the camera and app to the latest versions to fix bugs.
- Restart: Reboot the camera, router, and phone if connectivity fails.
Unique Insights for Seamless Connectivity
Here are some lesser-known tips to enhance your setup:
- Dual-Band Wi-Fi Optimization: If your router supports both 2.4GHz and 5GHz, dedicate the 2.4GHz band to cameras to avoid interference from other devices.
- VPN for Secure Access: Use a VPN on your phone to encrypt remote viewing, protecting footage from hackers, especially on public Wi-Fi.
- Power-Saving Mode: Enable low-power settings in the app to reduce data usage on cellular connections, extending SIM card data plans.
- Multi-Camera Management: Use apps like TinyCam to control cameras from different brands in one interface, simplifying large setups.
- Dynamic DNS for Remote Access: For advanced users, set up Dynamic DNS on your router to access cameras remotely without a subscription, saving costs.
FAQs About Connecting Security Cameras to Phones
Why Won’t My Security Camera Connect to My Phone?
Connection issues often stem from weak Wi-Fi signals, network mismatches, or app errors. Ensure both camera and phone are on the same 2.4GHz Wi-Fi network, as 5GHz isn’t always supported. Check app permissions for Wi-Fi and location access. Restart the router, camera, and phone, and update firmware. A user fixed their Ring camera’s connection by moving it closer to the router, reducing interference. If using a cellular camera, verify the SIM card’s data plan is active. Contact the manufacturer’s support if issues persist.
Can I Connect a Security Camera Without Wi-Fi?
Yes, you can connect a security camera without Wi-Fi using a cellular data plan or a local network. For cellular, insert an activated SIM card into the camera (e.g., Eufy 4G LTE Cam) and pair it via the app. For local viewing, connect the camera to a router via Ethernet or Wi-Fi, accessing footage when your phone is on the same network. Hotspots also work, but they drain phone battery. These methods suit remote areas but may limit remote access.
How Do I Share Camera Access with Others?
Most camera apps allow sharing access via email invites or QR codes. In the app, go to settings, select “Share Device,” and enter the recipient’s email or generate a QR code for them to scan. For example, Arlo lets you grant limited access (e.g., view-only) to family or employees. Ensure strong passwords and avoid sharing login credentials. Regularly review shared users in the app to revoke access if needed, keeping your system secure while enabling collaborative monitoring.
What Are the Best Apps for Connecting Security Cameras?
Top apps depend on your camera brand. Reolink, Ring, and Arlo offer user-friendly apps with QR code pairing and robust features like motion alerts. For multi-brand setups, third-party apps like TinyCam or Blue Iris consolidate control. Always download from the App Store or Google Play to avoid malware. A user praised Reolink’s app for its seamless 4G camera setup. Check compatibility with your phone’s OS (iOS/Android) and ensure the app supports features like two-way audio or cloud storage.
Can I Connect Multiple Cameras to One Phone?
Yes, most apps support multiple cameras on one phone. Add each camera via the app using QR codes or serial numbers, ensuring they’re on the same network or SIM plan. For example, a user managed 10 Wyze cameras through one app. Organize cameras by naming them (e.g., “Front Door,” “Backyard”). Use a robust Wi-Fi network or NVR for large setups to avoid lag. Third-party apps like TinyCam can streamline multi-camera management across brands, enhancing convenience.
Conclusion
Mastering how to connect security camera to phone unlocks the power of remote surveillance. Whether using Wi-Fi, cellular data, or a hotspot, the process involves downloading the right app, pairing via QR code or Wi-Fi, and optimizing settings. Troubleshooting tips and advanced hacks like VPNs or Dynamic DNS ensure reliable access. With these steps, you’ll monitor your property effortlessly, keeping safety at your fingertips, no matter where you are.